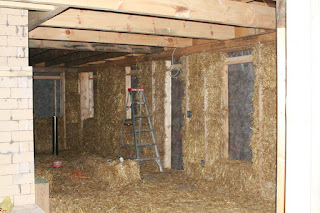
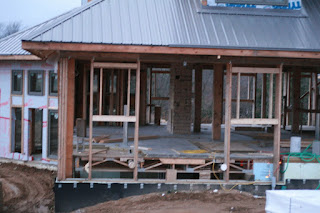
Thanks again to all who helped stack straw bales in November. Since then, the Camel's Back Construction crew has spent many hours on the site getting the bale wall prepped and plastered. Here are some pictures from the past 6 weeks.
We had to put tarps all around the house to keep the weather off the straw until the plaster was installed. Also, the plaster had to be kept warm until it cured, so we heated the space under the tarp. Not very efficient (lots of heat escaped through the tarps), but it had to be done.
Details of how the Camel's Back crew rounded the inside of the windows.
Here's Frank installing blue foam insulation over the upper stud wall. After plastering, the transition from straw bale (shown here covered with Typar) and stud wall will be invisible.
I'm going to install data wiring all over the house. A couple of those wires are in already. The blue wire here is a bundled data wire containing two RG6U-Quad and two Cat5E. The white wire in my hand is a standard 14/3 NMD90 wire for comparison.
The whole outside and inside of the straw bale wall is covered with this Tenax Cintoflex-D fencing mesh. Wherever two strips of mesh meet, they have to be stitched together with orange baling twine.
Electrical boxes are installed mounted to the lumber columns in the straw bale walls.
Here's a triple column to support a timber above. Before being prepped by the straw bale crew...
... and here's a similar column after being prepped. They covered it with Typar, then with 2.5 pound metal masonry lath.
Each window will get a wooden sill. The 2x4 on edge here is to support the inner edge of the sill, so that it's strong enough to hold a person.
Sunsets from my backyard are beautiful! I've taken many pictures of them already.
All the stick framed areas in the house are insulated with spray foam rather than batts.
I took a few days off to have a baby!
On the interior, all beams are masked so that plaster doesn't damage them.
Details of the flashing between the foundation and the straw bale wall system. It prevents moisture from wicking up into the straw bales.
Here's the crew plastering the exterior.
Another beautiful sunset.
Here's the outside done and some tarps removed. We'll paint it a moss green when the weather warms up.
Here's the frame that will hold the truth window.
More timber masking details.
Here you can see the brushed texture we asked the crew to apply to the exterior plaster. It looks really good.
The loft floor is mostly installed here.
Interior plastering is complete, and we're now putting in the interior wall frame.
Sunday, January 10, 2010
Monday, November 30, 2009
Bale Raising pictures
Elfrieda and I place the first bale.
Tina Therrien gives a talk about bale stacking.
Elfrieda's parents were among the volunteers at the bale raising. Here they are hard at work.
Here's Ron tying some baling twine.
My mother tying a bale. Tying bales is a lot of work.
Elfrieda tying some twine. She did very well considering she's 39 weeks pregnant!
My father places a bale.
Here's what the living room looked like after all the volunteers had gone home.
The LR from another angle. Note that the windows and doors are covered from the outside. What you're seeing is a bunch of Typar that Willy and John B used to cover the bales. Eventually we'll build a frame and install some tarps with enough room in there to set up scaffolding; when that happens, the Typar will come off. But until then, the Typar protects the straw from the elements.
The dining room and MBR.
Friday, November 27, 2009
Pre-strawbale raising pics.
Willie is installing a dormer window.
The garage is mostly insulated and has plywood interior walls installed. Plywood because for a garage I prefer it over drywall.
Some detail showing the east side of the house a bit. Notice the window bucks.
Barry was on site this week. He really cleaned up the walkout area. It won't be so wet anymore, but we should avoid driving over it with big machinery too.
Roofing is almost done. Just the NW corner still to do. Note the windows are in as well.
Sunday, November 22, 2009
New pics
Alex & Sergei working on the masonry heater.
Darkness falls, but the masonry work goes on.
The exhaust gases are guided down a bunch of channels, where they heat up the surrounding firebrick.
The west slope of the roof is the last to get the SIP panels. No sign of them yet.
The masonry heater work is coming along.
Insulating panels are added to the west roof.
Masonry heater core is complete. At some point down the road, a stonemason will put a 4" thick face on it.
The heater punches through the loft floor so that it can heat the loft as well as the main floor. But there's only one firebox, on the main floor.
Roofers are putting the strapping and steel on the east roof.
The front lookout peak roof is done (except for steel).
Subscribe to:
Comments (Atom)


